This guide provides a complete framework for moving from a PoC to a scalable product, covering the exact steps, team requirements, costs, and risks involved.
Highlights:
- Most PoCs fail because they lack production architecture, not because the idea is wrong.
- No-code tools excel at validation but break under real-world performance demands.
- The right development partner can preserve your PoC's core value while building scalable foundations.
Today, over 50% of PoCs fail to result in production deployments, with many more struggling to become market-ready products. But why so?
Your brilliant AI PoC into product transition or no-code prototype might validate your idea perfectly, but turning PoCs into products requires a completely different approach than building the initial concept.
While no-code platforms and AI tools enable rapid prototyping, they create a gap between impressive demos and production-ready systems. Moving from PoC to a scalable product demands architecture, security, and performance considerations that most prototype environments cannot handle.
At Mind Studios, we bridge the gap between innovation and commercialization. We've helped dozens of companies transform their promising prototypes into production-ready solutions that handle real user loads and business requirements.
Ready to scale beyond prototype? Your PoC proved the concept works. Now let's build the architecture to handle real users. Contact our team to get a free scalability assessment today.
What is a PoC?
A Proof of Concept (PoC) in software development is a preliminary implementation that demonstrates the feasibility of an idea, concept, or approach. The meaning behind a PoC is to validate technical viability before investing in full development.
Unlike a minimum viable product (MVP), a PoC focuses purely on proving that something can work, not on creating a market-ready solution.
Modern PoCs often leverage no-code platforms like Lovable, Bubble, Glide, or other AI generative development tools. These platforms excel at rapid prototyping but create significant challenges when it comes to PoC in production deployment.
When to scale your PoC
No-code tools excel at speed and idea validation but have clear limitations when it comes to production deployment. Thus, knowing when to scale your PoC is crucial for your product's success.
Your PoC proved the concept works, but can it handle what comes next? The decision to scale is all about business readiness and growth trajectory.
The biggest mistake we see is founders thinking their PoC is 80% of the work done. In reality, it's often just 20%. The remaining 80% is building the architecture, security, and performance systems that make it production-ready.
We've seen promising PoCs that handle 50 test users perfectly but crash completely at 500 real users because the underlying database wasn't optimized for scale. Production systems require monitoring, error handling, data backups, user authentication, and dozens of other critical components that simply don't exist in most PoCs.
— explains Dmytro Dobrytskyi, CEO at Mind Studios.
No-code vs. custom development: A detailed comparison
Choosing between continuing with no-code tools or transitioning to custom development affects every aspect of your product's future.
Here's a comprehensive breakdown of how these approaches differ across critical factors:
| Aspect | No-code tools | Custom development |
|---|---|---|
| Speed to prototype | Days to weeks | Weeks to months |
| Scalability | Limited (hundreds of users) | Unlimited scaling potential |
| Security | Basic/platform-dependent | Enterprise-grade implementation |
| Customization | Template-based constraints | Fully customizable solutions |
| Performance | Platform limitations apply | Optimized for specific needs |
| Cost structure | Low initial, expensive scaling | Higher initial, predictable long-term |
| Technical debt | High (platform lock-in) | Controlled and manageable |
| Integration capabilities | Limited to platform APIs | Unlimited third-party integrations |
| Maintenance control | Dependent on platform updates | Full control over updates and fixes |
| Compliance options | Platform-dependent limitations | Custom compliance implementation |
| Data ownership | Platform restrictions may apply | Complete data ownership and control |
| Team expertise required | Business users, minimal coding | Full development team needed |
Key indicators it's time to scale
The key is recognizing when your PoC has proven market demand but reached the limits of its current technology stack. Common signs include:
- Slower response times as user numbers grow;
- Hitting platform usage limits or subscription tiers;
- Needing features that your no-code platform doesn't support.
- Receiving user complaints about performance or functionality gaps.
Mind Studios’ insight: Many founders discover that their customer acquisition costs remain high because they can't implement the advanced features competitors offer. If you're spending more time working around platform limitations than building new features, or if enterprise clients are requesting security certifications your current stack can't provide, it's time to consider the transition. Understanding how to turn PoC into a product becomes critical at this stage.
Hitting platform limits with your PoC? Get a no-code to custom development transition plan tailored to your specific technology stack and growth goals.
Let’s explore tech
solutions
Get our expertise

Transforming your PoC into a production-ready architecture
Transitioning from PoC to production requires rebuilding your architecture with scalability, security, and maintainability in mind. The goal isn't to discard your PoC but to build enterprise-grade infrastructure around your validated concept.
Here is your roadmap.
Infrastructure and scalability planning
Your PoC likely runs on basic hosting with minimal traffic considerations. Production systems need a robust infrastructure that can handle growth without breaking down. This foundation determines whether your product succeeds or crashes when users actually arrive.
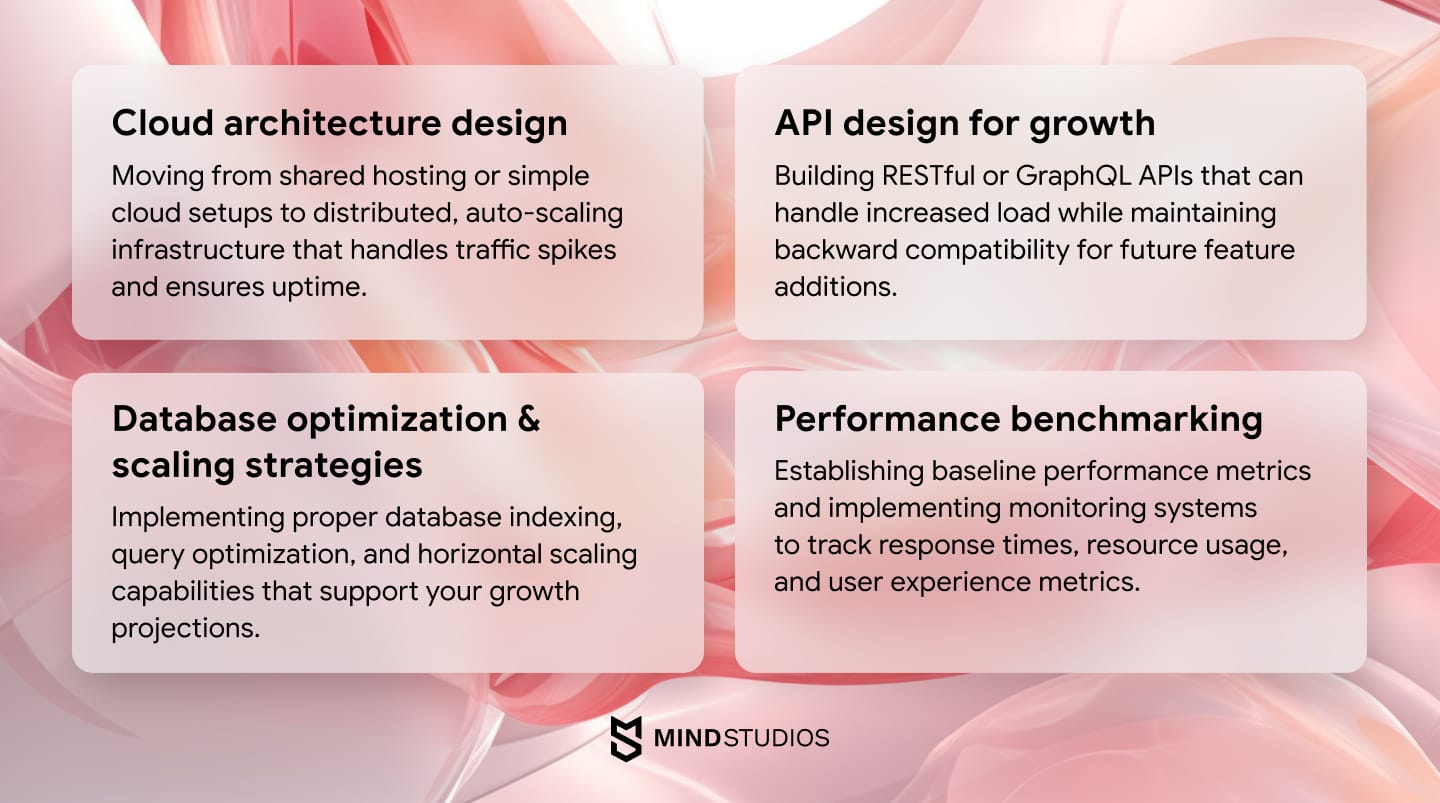
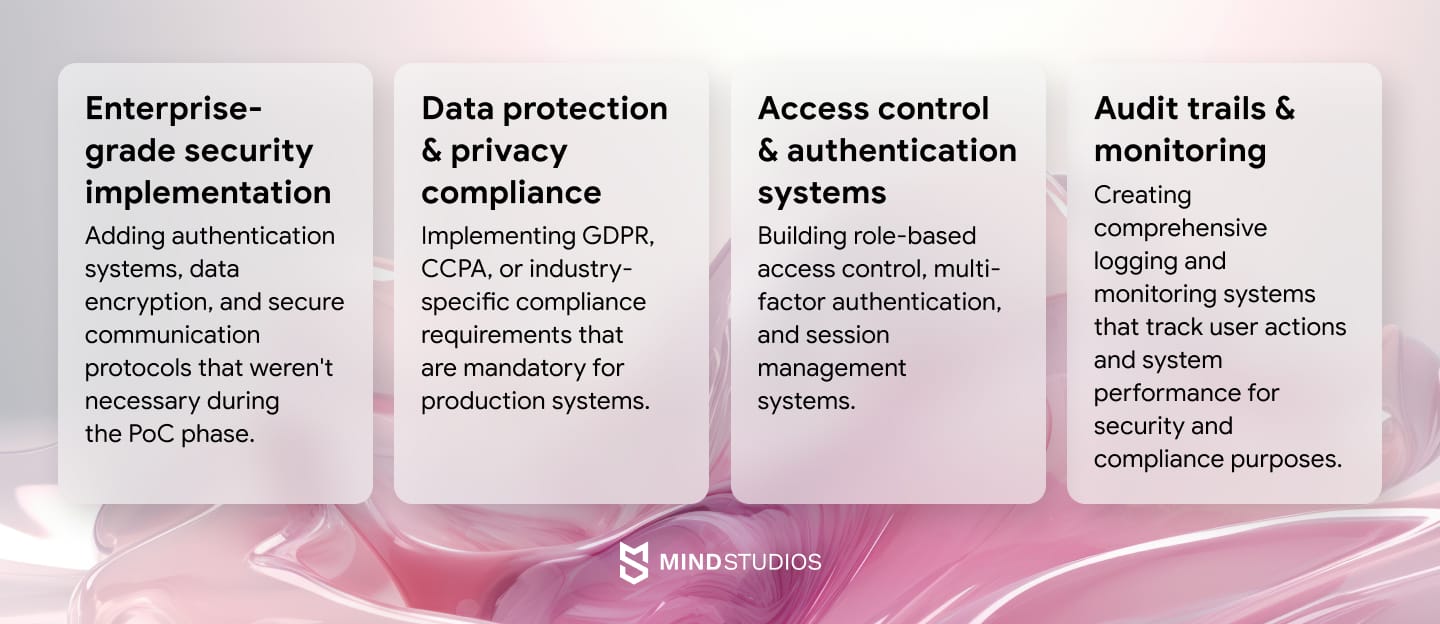
Security and compliance integration
PoCs typically skip security to focus on functionality, but production systems face real threats and regulatory requirements.
Security breaches can destroy organizations overnight, making this a non-negotiable priority for any production deployment.
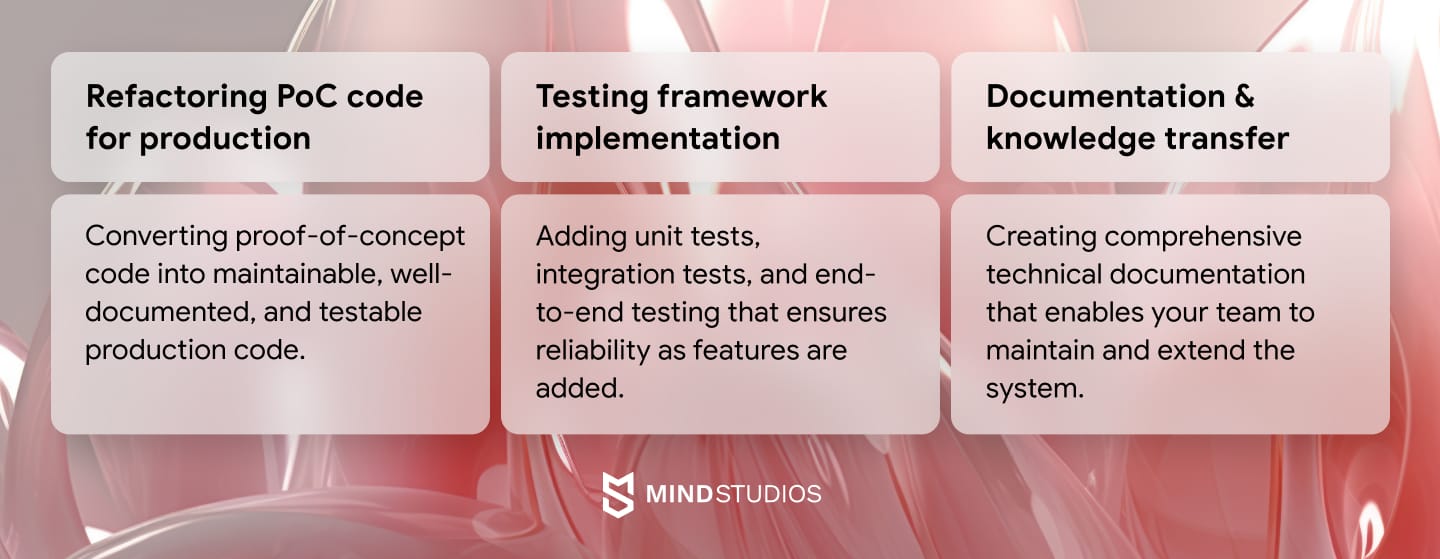
Code quality and maintainability
PoC code prioritizes speed over sustainability, often resulting in shortcuts that become expensive technical debt. Production code must be maintainable by teams, scalable for features, and reliable for users who depend on your system daily.
Mind Studios’ insight: We use the “3-layer validation” development approach: preserve the UI/UX that users validated, rebuild the logic layer for performance, and redesign the data layer for scale. This way, you keep what users love while fixing what they'll never see but will definitely feel if it's broken.
How to manage risks when scaling a prototype?
The journey from PoC to production introduces risks that didn't exist during the prototype phase. The companies that successfully scale their PoCs are those that anticipate these risks early and build mitigation strategies before problems occur.
Risk #1: Your PoC code will become unmaintainable technical debt
PoC code prioritizes speed over quality, using shortcuts, hardcoded values, and minimal error handling. This creates technical debt that compounds rapidly in production environments. Simple changes become complex puzzles, and adding new features requires extensive refactoring work.
Solution: Conduct a comprehensive code audit before scaling, identifying all technical debt areas and creating a refactoring roadmap that preserves functionality while improving code quality.
Risk #2: Your system will collapse under real user load
Your PoC may work great with the clean test data and controlled environment in which you built it. But real users are messy. A database query that runs in 100ms with 50 records might take 30 seconds with 50,000 records.
What’s more, performance issues become exponentially more expensive to fix after launch, often requiring complete architecture overhauls when users are already depending on your system.
Solution: Implement performance testing with realistic data volumes and user scenarios, optimize database queries, and implement caching strategies before going live.
Risk #3: Security vulnerabilities will expose your business to serious threats
PoCs rarely implement enterprise-grade security, often using default passwords, unencrypted data transfer, and minimal access controls.
Scaling PoC to production without proper security audits can expose your business to data breaches, compliance violations, and legal liability. In fact, even a single security incident can destroy years of reputation-building and result in massive financial penalties.
Examples of common PoC security gaps include hardcoded API keys, unencrypted database connections, and missing input validation.
Solution: Conduct thorough security audits, implement encryption, authentication systems, and access controls as part of the architecture rebuild, not as an afterthought.
Risk #4: Integration failures will block essential business operations
Many PoCs fail because they can't connect to critical business systems like CRM, ERP, or payment processors. Production systems must integrate with existing business processes, third-party services, and legacy systems that weren't considered during PoC development. These integrations often reveal data format inconsistencies, API limitations, and workflow conflicts that can delay launches by months.
Solution: Map all required integrations early in the planning phase, test connections with staging environments, and build flexible API layers that can adapt to different systems.
Risk #5: Your team lacks the skills needed for production operations
The skills that built your PoC may not be sufficient for production challenges like scaling, monitoring, incident response, and 24/7 system maintenance.
What’s more, PoC developers often lack experience with deployment pipelines, database optimization, security protocols, and performance monitoring. When production issues arise, inexperienced teams can make problems worse through improper fixes.
Solution: Assess current team capabilities against production requirements, provide targeted training for existing team members, or augment with experienced production engineers during the transition.
At Mind Studios, our tech team addresses these risks through comprehensive code audits that preserve PoC functionality while building maintainable foundations, multi-layered testing with realistic user loads, and safety nets like tested rollback mechanisms and disaster recovery procedures.
Furthermore, we build these protections before launch, not after problems occur, helping clients avoid the costly mistakes that derail most PoC-to-production transitions.
Worried about scaling risks? Contact us to get a risk assessment and mitigation plan designed specifically for your PoC's architecture and business requirements.
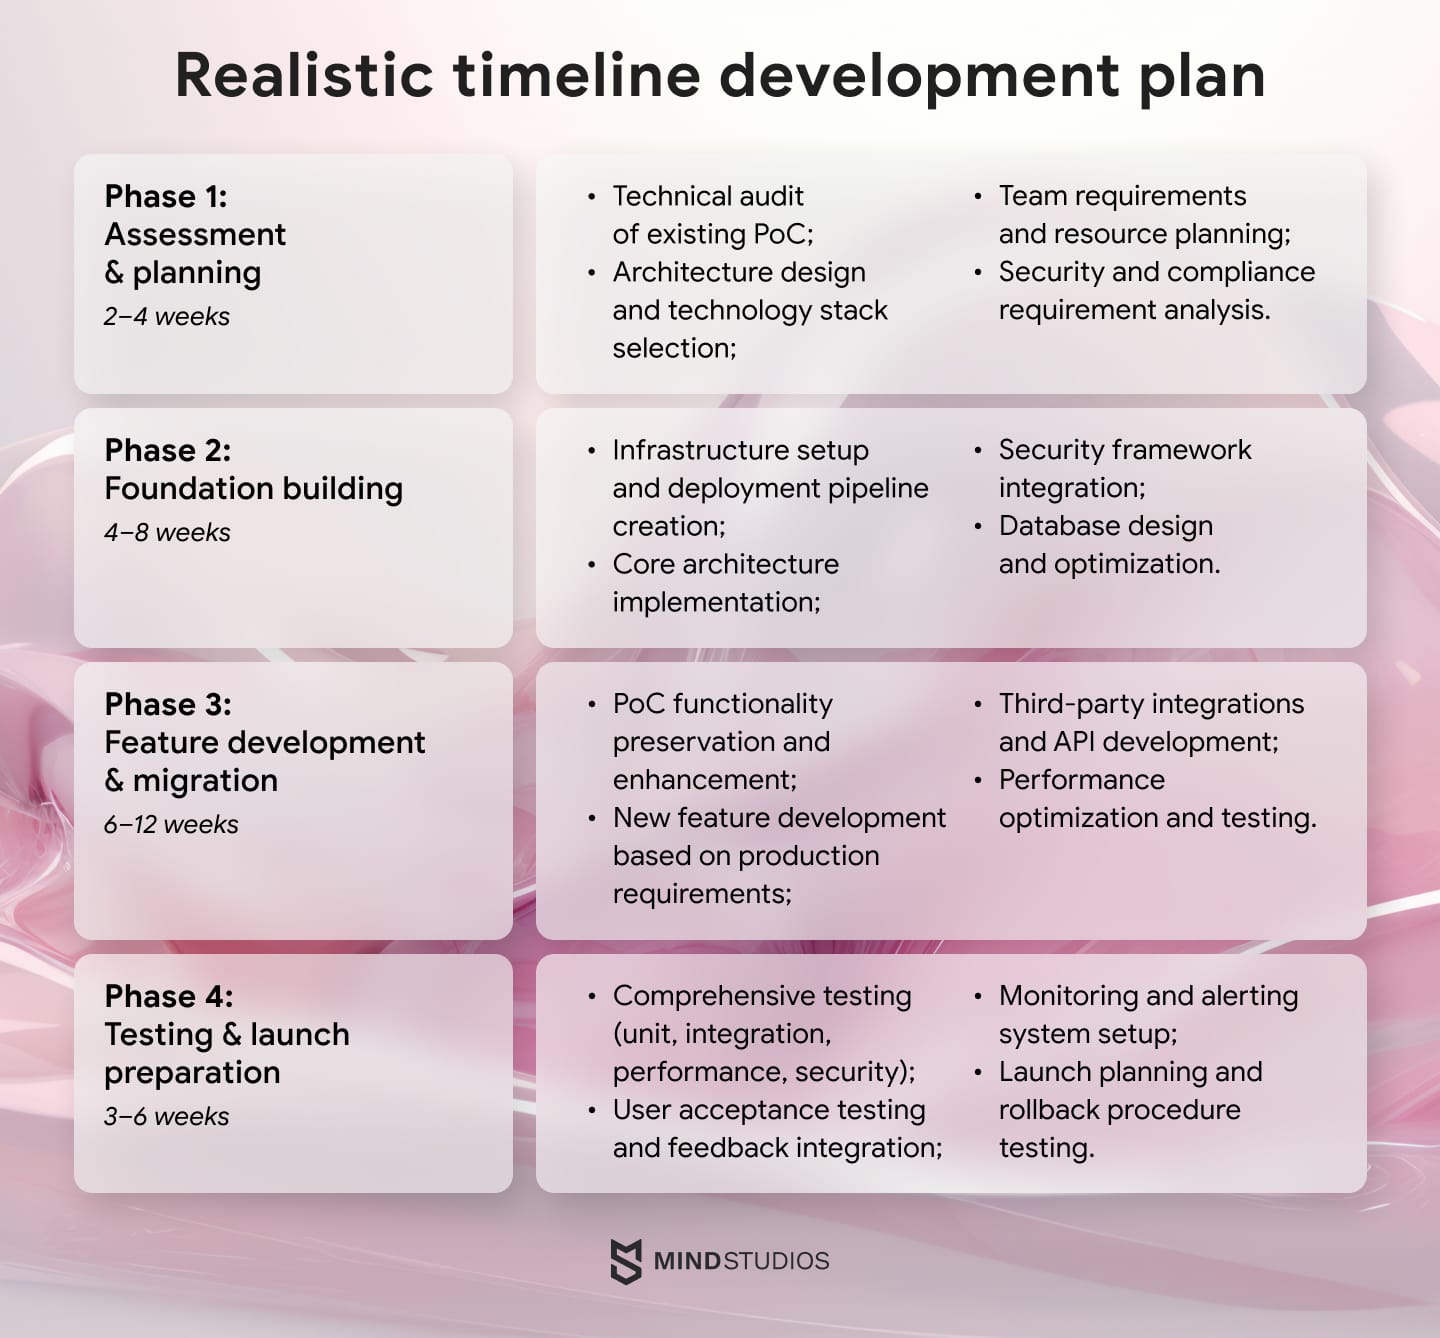
How much does it cost and how long does it take to go from PoC to product?
The cost of transitioning from PoC to production varies significantly based on your prototype's complexity, target scale, and technical requirements. However, understanding the key factors helps you plan realistic budgets and timelines.
Factors that impact timelines and budget
- PoC complexity and technical debt. Simple PoCs with clean logic require less refactoring, while complex prototypes with accumulated shortcuts need extensive rebuilding.
- Scalability requirements. Building for 1,000 users costs significantly less than architecting for 100,000+ users with global distribution.
- Security and compliance needs. Healthcare, finance, and other regulated industries require additional security measures and compliance implementations.
- Integration complexity. Standalone PoCs are simpler to scale than those requiring complex integrations with existing enterprise systems.
- Team composition and availability. Having experienced production developers versus relying entirely on external partners affects both the timeline and the cost.
Mind Studios’ recommendation: Budget 40% for architecture, 35% for development, and 25% for testing and deployment. Most teams reverse this ratio and wonder why they have performance issues. Also, plan for 'discovery debt' — features that seem simple in your PoC but reveal complexity during production development.
Mind Studios' resource optimization strategies
Scaling from PoC to production doesn't have to drain your budget or take twice as long as expected.
Our proven optimization strategies help clients reduce development costs while accelerating time-to-market, based on lessons learned from dozens of successful PoC transitions.
- Phased development approach: We launch core PoC features first, then add advanced functionality based on user behavior and revenue impact. This typically reduces initial costs by 40–60% and enables faster revenue generation.
- Strategic technology stack selection: We choose technologies that align with your team's existing skills and maintenance capabilities, reducing onboarding time by weeks and preventing expensive future migrations.
- Test automation from day one: Our tech team implements automated testing during initial development, which pays for itself within 3–4 months by reducing manual QA time by up to 70%.
- Cloud-native architecture with cost optimization: We use managed cloud services with cost monitoring and auto-scaling, helping clients save 30–50% on infrastructure costs while gaining better performance.
- Continuous integration for faster releases: Our CI/CD pipelines reduce deployment time from hours to minutes while eliminating human errors that cause downtime.
What’s more, at Mind Studios, we provide complete budget visibility with no hidden costs or surprise expenses. Our detailed project estimates include contingency planning and clear milestone-based billing. Plus, our IT consulting services help organizations make strategic technology decisions throughout the scaling process.
Want cost clarity for your specific project? Contact our tech team and get a detailed estimate with a timeline breakdown.
Summing up
If your PoC proved the market really wants your solution, now it's time to build a product that can deliver it at scale.
The transition from PoC to production is all about preserving its core value while building the architecture, security, and performance foundations needed for real-world success.
Remember these key principles:
- No-code and AI tools excel at validation but rarely handle production requirements;
- Architecture and security must be built in from day one, not retrofitted later;
- The right development partner preserves your PoC insights while solving scalability challenges;
- Proper planning and phased development reduce risk and control costs.
With the right partner and approach, your PoC can become the foundation of a thriving business. Mind Studios specializes in this exact transition, helping founders transform validated prototypes into scalable products without losing what made them successful. Our approach preserves your PoC's core functionality while building the architecture, security, and performance systems needed for real-world success.
Ready to turn your prototype into a scalable product? Book a free technical assessment session with our CTO to create a custom roadmap for your PoC-to-production journey.