Without proper planning, growth becomes your biggest enemy instead of your greatest opportunity. This guide shows how to build a scalable software architecture that turns rapid expansion into a competitive advantage.

Highlights
- Poor architecture turns startup growth into your biggest liability instead of an asset.
- Smart foundational decisions prevent costly rewrites and emergency fixes later.
- From our experience, the right scaling approach reduces costs by 50% while improving performance.
Every successful startup faces the same crossroads: rapid growth that either validates their scalable software architecture or exposes critical flaws that threaten their future.
When Instagram was acquired by Facebook for $1 billion, it had just 13 employees serving 100 million users — proof that getting the architecture right early pays off.
Conversely, companies that ignore scalability often face what we call "scaling friction" — the exponential increase in costs, delays, and technical complexity as they grow.
Building a scalable software architecture means making smart decisions that support growth without unnecessary complexity. When done right, it translates to higher revenue and competitive advantage.
Mind Studios has been helping startups and enterprises navigate their architectural decisions for more than a decade, supporting over 50 successful projects across industries like healthcare, fintech, and logistics, among others. Our experience shows that the right foundation, built with scalability principles from scalable software architecture, pays dividends in speed, stability, and sustainable growth.
Ready to build an architecture that grows with your business? Contact our tech team for your free action plan.
Empower your project
with concrete tech
expertise
Contact Mind Studios

Why scalable architecture is your competitive advantage
To understand why architectural decisions matter so much for business success, let's start with the moment every growing company faces: when success starts breaking your systems.
The difference between companies that thrive and those that struggle isn't avoiding growth challenges — it's building architecture that turns growth pressure into competitive advantage rather than operational crisis.
Netflix learned this lesson the hard way. Their monolithic DVD-by-mail system worked perfectly until they pivoted to streaming and had to completely rebuild their technology stack.
Smart companies plan for scalability from the beginning, avoiding costly rewrites when growth accelerates. And the key is finding the right balance between speed and sustainability. As Dmytro Dobrytskyi, CEO at Mind Studios, explains:
You don't need to build for a billion users on day one, but you do need to make architectural choices that won't paint you into a corner. The sweet spot is designing systems that can evolve gracefully — where adding new features or handling more load is a configuration change, not a complete rewrite.
Unfortunately, Netflix's experience isn't unique among growing companies. In our decade of helping startups scale, we've seen how poor architecture doesn't just slow you down but actively sabotages your growth in four critical ways.
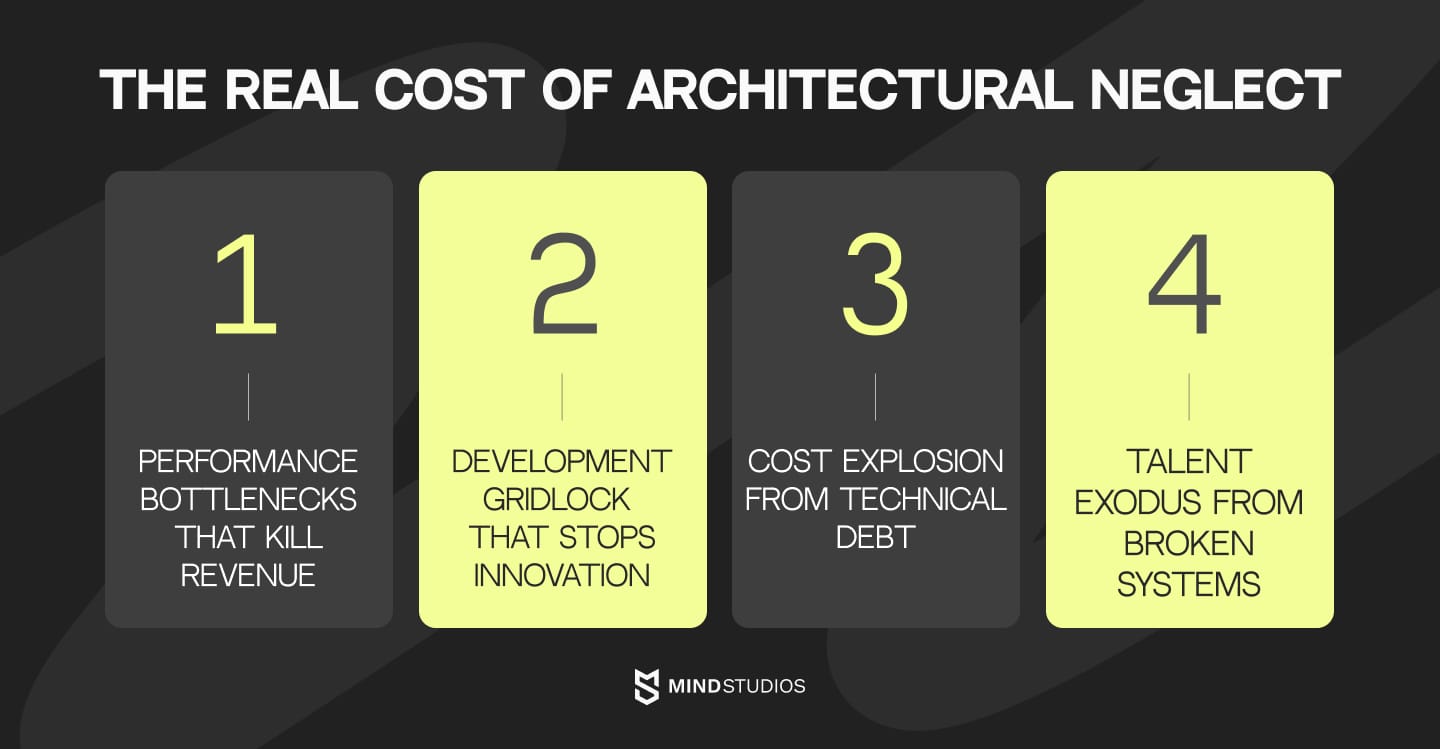
Performance becomes your bottleneck
When 53% of mobile users abandon pages that take longer than three seconds to load, and every 100ms delay decreases conversions by 7%, your architecture directly impacts revenue. Poor systems turn new customers into liabilities instead of assets.
Development grinds to a halt
Simple feature requests become complex engineering challenges involving multiple systems, extended testing cycles, and risky deployments. With 42% of developer time spent fixing technical debt instead of building valuable features, innovation stalls when you need it most.
Costs spiral out of control
Technical debt accounts for about 40 percent of IT balance sheets, and companies pay an additional 10 to 20 percent to address tech debt on top of the costs of any project. This so-called "scaling tax" only gets worse over time, eventually consuming most of your development budget.
Talent walks away
Quality engineers avoid projects with poor architecture. When your codebase becomes a maintenance nightmare, you'll struggle to attract talent while your existing team fights the system instead of building solutions.
How smart infrastructure decisions drive business success
Understanding these risks helps explain why smart architectural choices directly impact your bottom line and market position:
- Rapid market response. Deploy new features and enter new markets without major infrastructure overhauls.
- Cost efficiency. Scalable applications built on the cloud can dynamically adjust resources based on demand, allowing businesses to pay only for what they need.
- Competitive differentiation. Maintain performance advantages even as your user base grows.
- Investment readiness. Demonstrate to investors that your technology can support projected growth.
Understanding best practices for building scalable software early helps you make informed decisions that prevent costly rewrites later.
What to plan from day one: foundations of scalable architecture
Now that we understand why architecture matters for business success, let's examine the specific decisions that will determine your scaling future. The decisions you make in your first sprint will either enable or constrain your growth for years to come.
Here's how to build foundations that support scalability without overcomplicating your initial development.
Critical architectural decisions for a scalable system
Decision point |
Scalable approach |
When to choose |
|---|---|---|
App architecture |
|
Teams < 10, clear bounded contexts. |
Database strategy |
|
|
Infrastructure |
|
For all modern applications expecting growth. |
API design |
|
Any external integrations or mobile apps planned. |
DevOps setup |
|
Teams shipping regularly or planning rapid iterations. |
Mind Studios’ insight: The key insight from our experience is that these decisions aren't independent — they work together to create a foundation that scales smoothly. For example, choosing a modular monolith with clear API boundaries makes the eventual transition to microservices straightforward, while cloud-native infrastructure ensures your deployment story remains consistent throughout that evolution.
Most successful scaling stories we've guided follow a similar pattern: start with solid fundamentals that don't limit future options, then evolve incrementally based on actual growth patterns rather than theoretical needs.
The companies that struggle are usually those that either over-engineer from day one or make early choices that create architectural dead ends.

Microservices vs. monolith architecture
Today, the architecture debate has shifted from "monolith vs. microservices" to "when and how to evolve." Both approaches have their place, but the timing and implementation strategy can make or break your scaling efforts.
- Monolithic architecture packages all functionality into a single deployable unit. This means shared databases, unified codebases, and coordinated deployments. While this can feel limiting, it offers significant advantages for small teams: faster development cycles, simpler debugging, and straightforward deployment processes.
- Microservices architecture breaks functionality into independent services that communicate over well-defined APIs. Each service can be developed, deployed, and scaled independently. In most cases, companies adopting microservices can reduce time-to-market, but this comes with increased operational complexity that can overwhelm small teams.
Many startups rush into microservices, attracted by stories of Netflix and Amazon's success.
However, these companies evolved to microservices after reaching massive scale with established teams and a mature DevOps strategy. Premature decomposition often leads to distributed monoliths — all the complexity of microservices without the benefits.
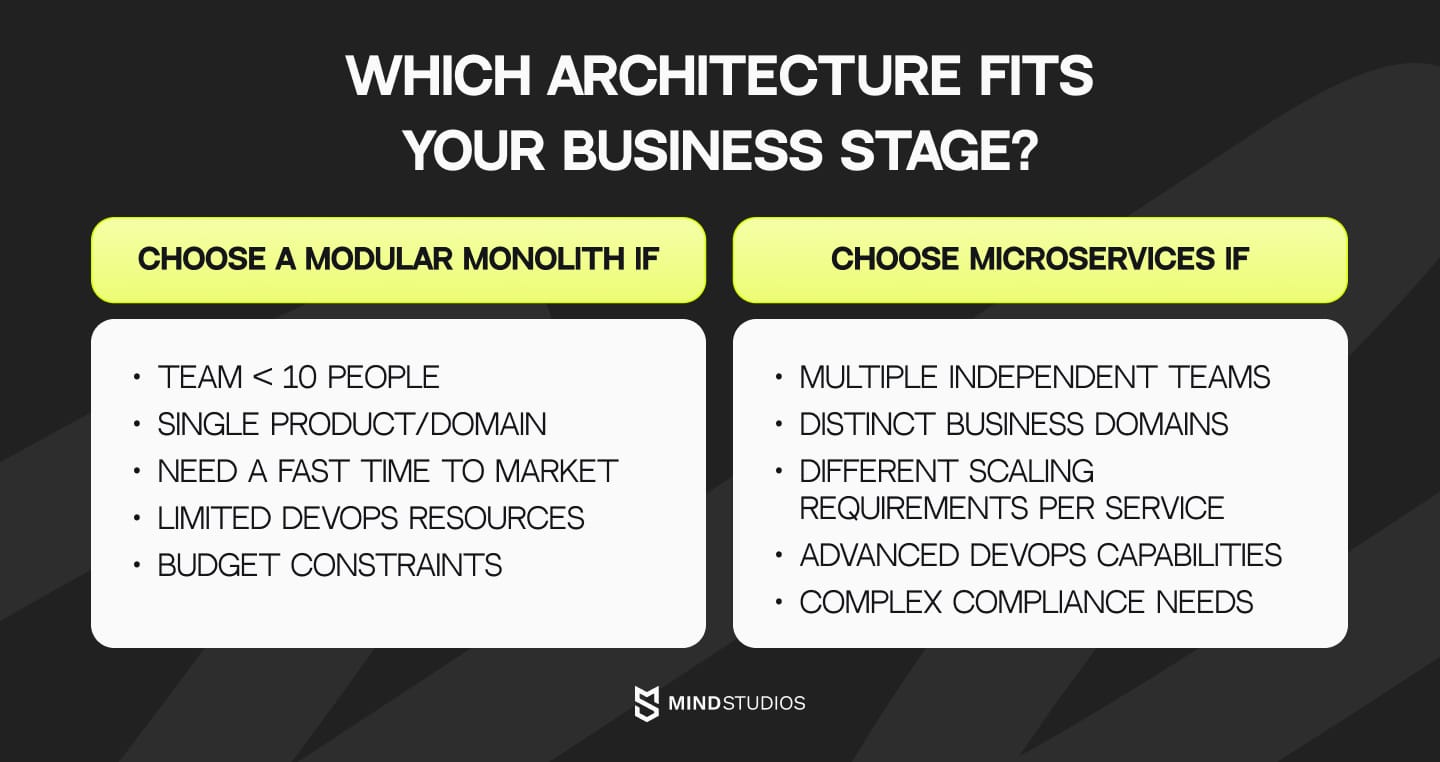
The solution we recommend to most of our clients: a modular monolith as your scaling bridge.
Instead of choosing between extremes, smart teams use a modular monolith pattern that combines monolith simplicity with microservices preparation:
- Start with a single deployable unit for faster development and easier debugging;
- Design clear module boundaries based on business domains, not technical layers;
- Plan service extraction points for future scaling needs using domain-driven design principles;
- Maintain the option to split services when team size or performance demands it.
Not sure which architectural approach fits your stage? Let our experts guide your decision.
Warning signs your architecture can't handle growth
Even with solid foundational decisions, every growing company eventually faces scaling challenges. The key is recognizing them early as this gives you options. Wait too long, and you'll face emergency rewrites under pressure.
Here are the critical warning signs that indicate your system needs architectural attention — the same patterns we see repeatedly when companies call us for help.
Performance red flags
When your application can't keep up with user demand, it directly impacts revenue and user experience. These metrics show your system is struggling under the current load.
Warning sign |
Key metrics |
Scalable solution |
|---|---|---|
Response time degradation |
|
|
Traffic spike failures |
System crashes during traffic spikes, or becomes unresponsive with multiple concurrent users. |
|
Development velocity indicators
Poor architecture doesn't just affect users — it cripples your development team's ability to innovate and respond to market demands quickly.
Warning sign |
Key metrics |
Scalable solution |
|---|---|---|
Feature development slowing down |
|
|
Release cycles complications |
|
|
Business scalability constraints
Architecture limitations that prevent your business from expanding into new markets, serving more customers, or adapting to changing requirements.
Warning sign |
Key metrics |
Scalable solution |
|---|---|---|
Geographic expansion limitations |
|
|
Multi-tenant app architecture challenges |
|
|
How Mind Studios addresses scaling challenges
Recognizing these warning signs is crucial, but knowing how to fix them systematically is what separates successful scaling from expensive rebuilds.
Most companies come to us when they're already experiencing scaling pain, but the smart ones engage earlier to implement best practices for building scalable software architecture during their growth planning phase.
We use data from your current system to model future load patterns and identify specific bottlenecks before they become critical, enabling targeted improvements instead of expensive over-engineering.
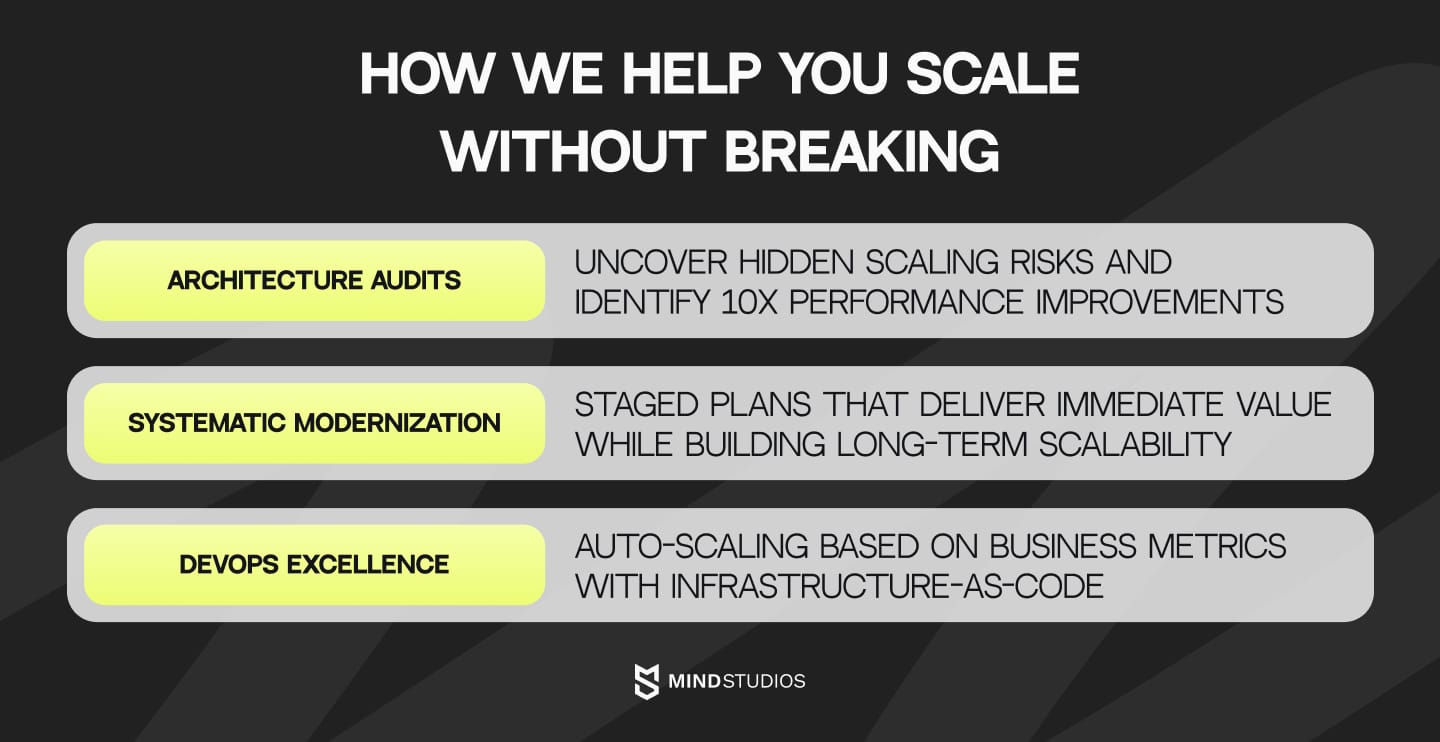
Architecture audits that prevent crises
Our comprehensive reviews uncover hidden scaling risks by analyzing code quality patterns, database performance bottlenecks, and infrastructure utilization limits. We identify query optimizations that can improve response times by 10x and assess security readiness for increased scale scrutiny.
Systematic modernization without business disruption
We develop staged modernization plans that systematically add scalability features to the architecture while delivering immediate value. Starting with monitoring systems for visibility, we implement high-impact improvements quickly, then extract services incrementally based on actual needs while maintaining business continuity.
DevOps excellence that accelerates growth
We implement systems that automatically scale based on business metrics rather than just technical thresholds, ensuring infrastructure responds to actual customer demand.
Our infrastructure-as-code approach eliminates deployment surprises while robust disaster recovery and fault tolerance planning protect business continuity during global scaling.
Scaling strategies tailored to your business stage
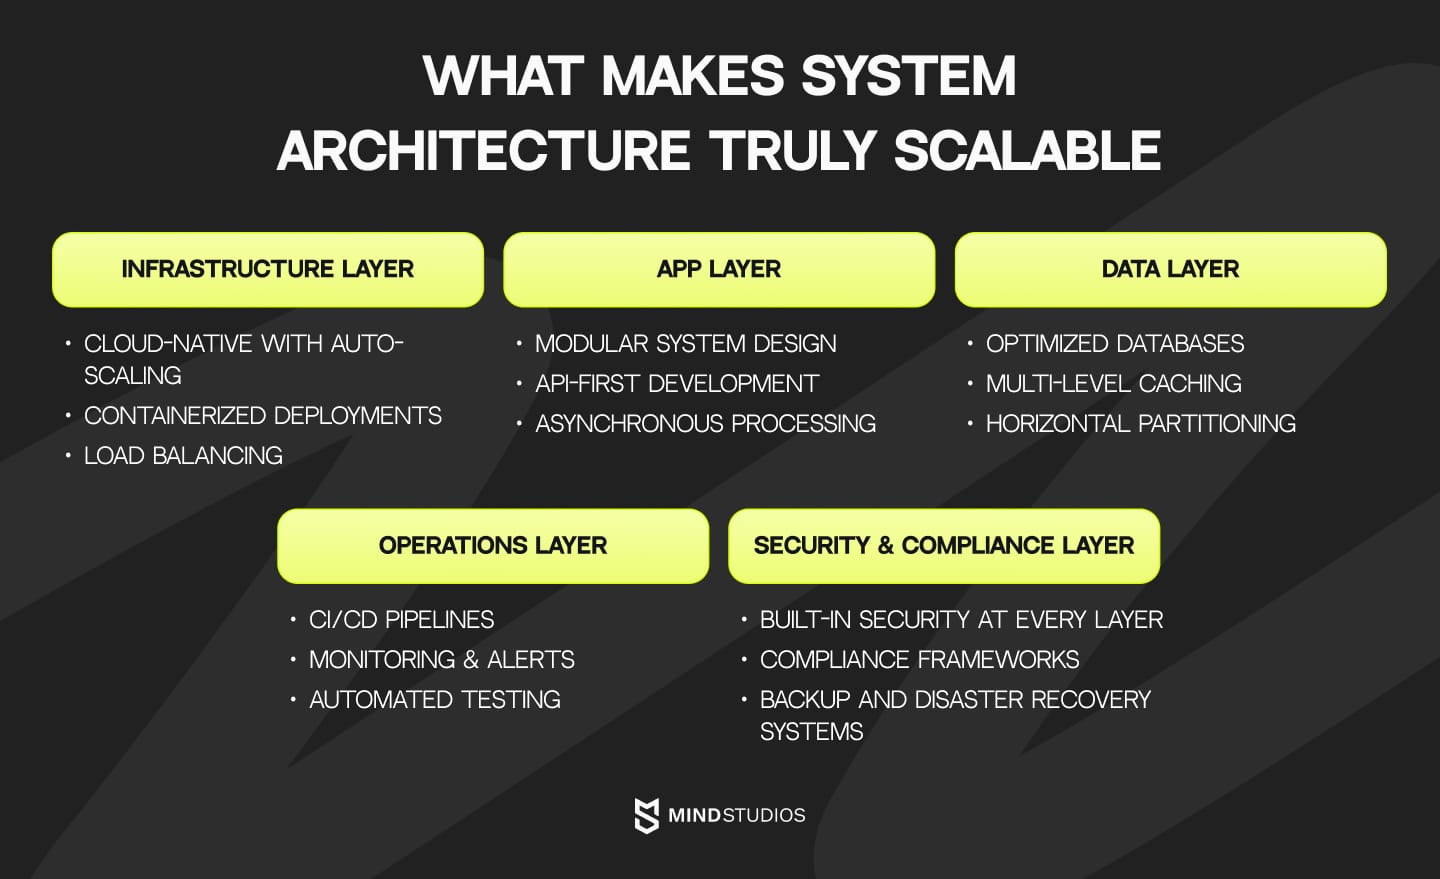
- Early-stage startups get modular monoliths with clear boundaries, cloud-native auto-scaling, and streamlined CI/CD for rapid iteration.
- Growth-stage companies receive service extraction based on actual bottlenecks, advanced caching for 10x traffic handling, and enhanced monitoring for early issue detection.
- Enterprise-scale organizations get sophisticated microservices with API gateways, multi-region infrastructure, and self-healing automation systems.
Wrapping up
Scalability isn't a problem you solve later — it's a foundation you build now. Whether you're launching your first MVP or planning to scale an existing product, the architectural decisions you make today determine your growth trajectory tomorrow.
The companies that succeed aren't necessarily those with the most resources; they're the ones that understand how to create a scalable software architecture early and evolve their systems thoughtfully.
At Mind Studios, we've seen the difference that thoughtful architecture makes. Our clients don't just avoid scaling crises; they turn their technology into a competitive advantage that enables rapid market response, efficient resource utilization, and sustainable growth. By following our proven steps to design a scalable software architecture, organizations can build systems that support long-term success.
The pattern across all successful scaling stories is consistent: The right time to think about scalability is now, before you need it. Whether it's building scalable architectures from scratch or modernizing existing systems through system redesign, the investment in proper architecture patterns pays dividends in every aspect of your business scalability.
Ready to build architecture that scales with your success? Get your free scaling roadmap.